If you really know me, you knew the day had to come. Sooner or later, I had to paint the kitchen cabinets.
The kitchen was just too…. brown. Although the cabinets are almost new, and in excellent shape and very nicely made, the cherry stain and the dark stained hardwood was just too dark, and really not my style.

White and neutrals are soothing and serene for me. They refresh and revive me. :)
There were a few helpful and concerned friends who really abhorred the idea of me painting beautiful stained cabinets. They cajoled. They pleaded. One even threatened to take away my white paint and all my painting tools!
They’re so funny.
But if you know me, you knew I would paint them. You knew it all along. And you didn’t try to dissuade me, or tell me I was making a big mistake. You just smiled and nodded knowingly when I told you my plans.
I read many, many tutorials on painting kitchen cabinets. No two people did it exactly the same way. I learned some very helpful tips, like putting Vaseline or Chapstick on the inside edges of the cabinets and drawers after they are painted, to keep the paint from sticking as the paint completely cures. This was hilarious because we all kept forgetting it was there. So we would open a cabinet and smear our fingers on greasy Vaseline. Several times, I saw one of the kids wiping their hands off on their pants after getting a drinking glass out of a cabinet. But it worked wonders. The paint has stayed in place.
One blogger in particular, www.inmyownstyle.com, had the best idea yet. Instead of doing the entire kitchen at once, she broke hers down into 3 weeks. Wow! What a great idea!
We have company here almost every weekend, and I didn’t want our kitchen to be a mess, with cabinet doors everywhere while we had guests. So I began with the wall of cabinets where the refrigerator is. Turns out this was sheer, accidental genius on my part. Not to brag.
That’s because after I finished that section and moved on to my other 2 in succession, I realized the first one had had the most nooks and crannies to try to poke a paint brush into, as well as the most doors to take apart and put back together.
I left everything in the cabinets, since I didn’t need to paint the insides.

I took off all the hardware for each door or drawer, put them into little baggies and numbered them in order of how I took down the doors. Then these little baggies followed their doors or drawers wherever they went. When the doors were being painted outside, the baggies were on the floor or the bench directly in front of their door. When I brought the doors in at night to dry in between coats, the baggies came in, too, sitting right in front of their assigned door.
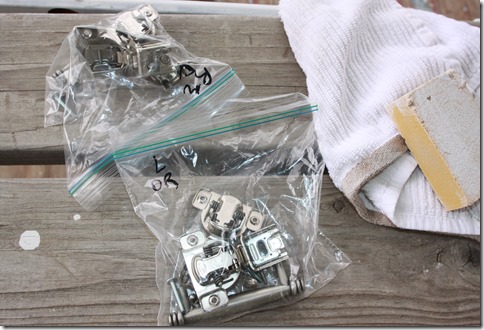
Taking off the hardware and removing the doors, and then replacing it all afterwards was very time-consuming. For the first section of cabinets alone, it took me almost 2 hours to put the hardware back on and hang them when they were finished. It was about the same amount of time to remove them. But it was worth it. It’s just not possible to get a smooth look while trying to paint around handles and hinges.
I started by painting 2 coats of Zinsser oil-based primer, using a midget foam roller and a small brush for the hard to reach corners. I made sure to sand before I started, and between each coat of primer, and I painted with light, thin coats to minimize dripping.
Then I used a 2 1/2 inch Purdy paintbrush to paint the semi-gloss paint on the doors and drawers. I sanded between every coat. Yes, it was time consuming, but I think it really made a difference in the final look. I painted 3 coats of my Crisp Linen white trim paint, the same color I have used on all the trim and in the dining room and our new area.
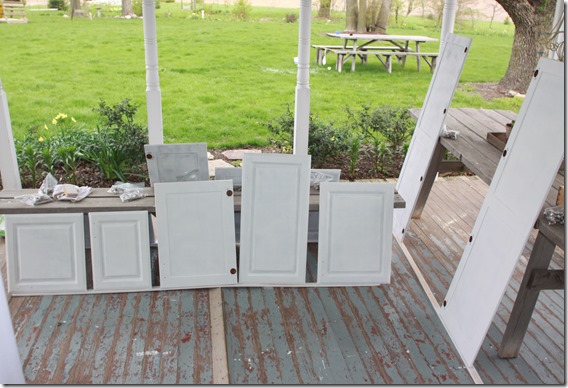
Don’t forget to use paint conditioners. For the oil-based primer, I added Penetrol. Then with the latex, semi-gloss paint, I added Floetrol. That was another tip I learned from this blogger, http://www.centsationalgirl.com/. The conditioners make an unbelievable difference! They make the paint a little thinner, so it is easy to apply, they help lengthen the drag time in case you see a spot you want to touch up while you’re painting, and they help the finished look to be free of brush strokes. The additives work like a charm. And they are inexpensive.


I also spray painted the mounting hardware for my little sink curtains. The rod was already silver, but the holders and screws were brass. Since they would be a little more obvious against the new white cabinets, I decided to go ahead and take care of them while everything was already a mess. So I stuck the screws in a little green floral foam block to keep them upright, and sprayed them and the brackets with some silver metal spray paint.

They matched the rod perfectly!

For 3 weeks, I started each of my cabinet “zones” on a Monday morning. In between monitoring school for the kids, and other household tasks, I painted and sanded. I have to admit that by the third week, it wasn’t quite as “fun”, and I had lost a little of my original zeal and enthusiasm. But I couldn’t exactly quit, right?
And now…. I love it!! I’m so glad I did it. The kitchen is now so bright and cheery. For the first few days, Glenn said it felt “disorienting” to walk into the room because it just looks so different!
One funny thing I realized was that although I hadn’t liked the pattern or color of the marble countertops when the cabinets were brown, I am perfectly content with them now that the cabinets are white.
Although we’re not completely finished, the girls told me to go ahead and post pictures. So I will. :)
Here are a few “before” and “after” shots:


And just a few different angles…


We plan to put up a beadboard backsplash, some pretty decorative brackets under the upper cabinets, and some finials on the lower ones, to look like feet. But that is a few weeks away. Eventually, we will also replace the 2 cabinet doors above the range with a solid face and a mantle.
But for now, it’s good. :)
Have a great day!


